Event Code: UI design with XAML in Visual Studio 2017 - 2
I assume you have followed me with this post here:
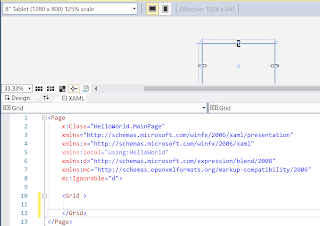
After reading the above you will see that you start with an empty project whose code is shown here:
WinPhoneStep1
In the final step you will have achieved this:
WinPhoneStep11
This project when deployed will just show a button as in the above and nothing more:
WinPhoneStep13
Writing code for a click event of this button.
Let us first give a name for this button, like ClickMe. When you highlight the button in the design by clicking it, the Property pane opens where you can write the name you want as shown.
winPhoneStep20
In the XAML code the Button gets a qualifier x:Name="ClickMe" as shown here:
Now enter the Click event to the code by just enter "cl" after a space as shown and the intellisense kicks-in showing your options as shown.
winPhoneStep22.png
You pick Click and you will see the following:
winPhoneStep23.png
Inside of double quotes type in ClickMe_Click (i.e., the name of the event).
Where do you write code ?
Make a right click on 'Click' as shown in the next image and you will see a pop-up as shown.
winPhoneStep24
At the top click on View Code (or F7) and you will go the code page in C# (MainPage.XAML.cs) as shown.
-----------
namespace HelloWorld
{
///
{
///
/// An empty page that can be used on its own or navigated to within a Frame.
///
public sealed partial class MainPage : Page
{
public MainPage()
{
this.InitializeComponent();
}
private void ClickMe_Click(object sender, RoutedEventArgs e)
{
{
}
}
}
---------------
This by itself set up the scene for you to write the code.
Now you have to decide what it is you want to do when the button is clicked.
Let us say you want the font size of 'Hello' to increase so that after clicking the size, say double from 25 to 50.
Then you have to change the button's font-size property (initially 25 in design) as shown. You should leave the rest as is.
---------
private void ClickMe_Click(object sender, RoutedEventArgs e)
{
{
ClickMe.FontSize = 50;
}
---------------------
Now if you BUILD the project and run as described in the earlier post you would see the following:
winPhoneStep25
Now you can click the Run button (Green arrow-head) with the following setting:
winPhoneStep26
After some processing your application displays with the start up page the following:
winPhoneStep27
After the start this is the first page.
winPhoneStep28
and when you click the button changes to this:
winPhoneStep29
That is all there is to it!
Happy New Year


Comments