UWP: Navigation using SplitView
SplitView has two panes and in one of them you place items that allow you to navigate to the details of that item and its contents. You can basically use some event handlers to the items and when the event occurs, you display the content for the item.
Here is the scheme for navigation:
SplViewNav_0
You have three objects in the SplitView pane (Rose, Jasmine, Lily). You attach events to these objects and when the event is fired, you display the related content in the area on the right, the Content.
Before you read this post, please make sure you read the two following posts:
Displaying image in the Assets folder:
Navigation with SplitView:
Description of App in xaml designer
Start with a UWP Blank project and provide a name. In this it was named JSplitView.
The code for MainPage.xaml is shown here:
SplViewNav_1
I just palced a ListBox control and inside of which I placed three ListBoxItems named itm1, itm2 and itm3.
I also arranged for the event by invoking the KeyDown event. Although I used KeyDown of ListBox, you could have used three Button's and use its Click event.
The Content pane is the Grid element where in I placed a placefolder for an image with the name Img.
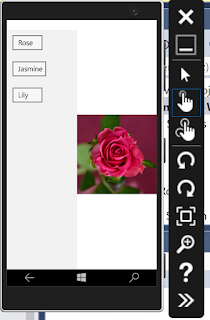
In the Design, the app appears as shown in the first image above in the post.
As soon as you place the 'KeyDown' event in the MainPage.xaml, the events show up in the MainPage.xaml.cs page as shown:
SplViewNav_2
Now if you have read my earlier posts, you would see that I wrote code in the Itm_KeyDown events to access the three image files in the Assets folder. Of course, you need to make sure that you add the three images (the images may be your own) to the Assets folder.
This completes the app and all you need to do is to Build, Deploy and Run.
When the app is launched, this is what you see:
This image is when any key is pressed when the cursor is on the item when run on Local Machine.
This one on a 4inch 512 MB emulator.


Comments