Start developing a ionic mobile app with Appery.io Cloud Platform
In this post, I show details of creating a mobile app and viewing it on iPhone 6S. The details are also available on the Appery.io site but here in you will get to see the step by step screen shots.
If you have followed my posts on Intel XDK (http://hodentekmobile.blogspot.com/search?q=intel+xdk) , you will have no trouble in following this post. With Intel XDK not supporting some of the editing features Appery.io editor seems to fill in the void. I will explore it a little further to see how far this is taken.
First come first.
You need to first sign up here:
https://appery.io/account/signup
Go to your email and confirm your account. Once you have the account you can build.
Go here to get to the developer platform:
https://appery.io/app/projects
Click on Apps. I have found the server to be very slow and you may have to wait a considerable time.

You may get error messages regarding this.

Click Create New App.
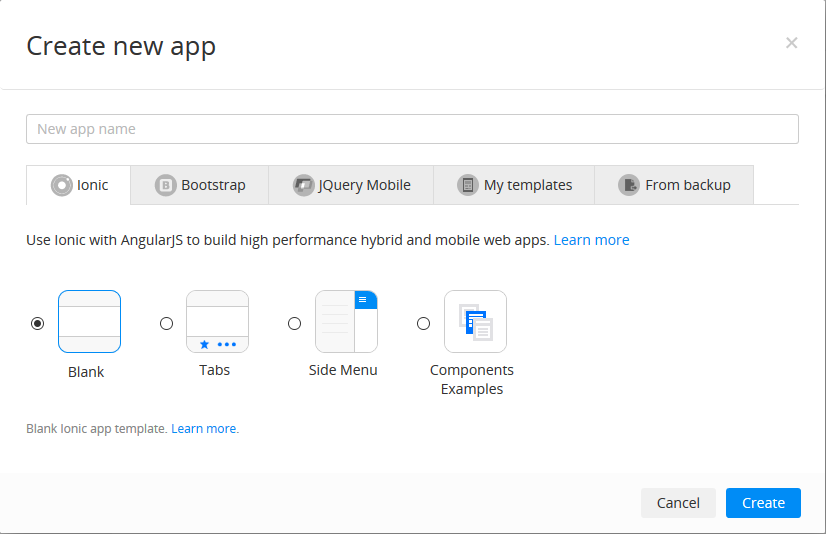
Provide a name for the app after choosing IONIC (do you see the similarity to Intel XDK?). Appery.io uses 3 of the discontinued frameworks in Intel XDK.
Your project is created with necessary folders etc. as shown.

Click on Pages | Index

The DESIGNER is opened as shown above. Change the Header text as shown in Properties|Header on the right. It is immediately changed in the DESIGNER.

Click on Screen1 as shown below.
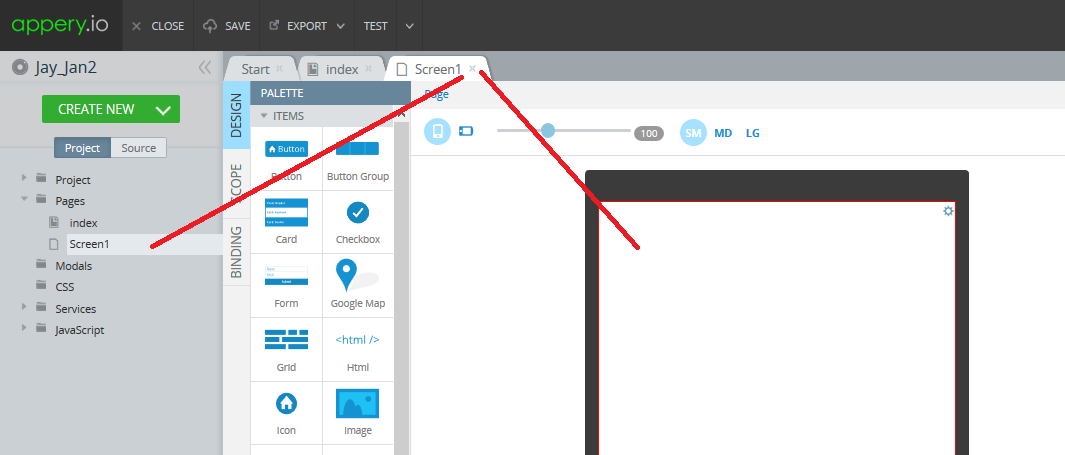
Now you are working in the body of the app.
Now drag and drop a CARD from the PALETTE. Change the Header to read Hello World Ionic in the Properties - Card ITEM as shown. |

For the Item text of the field we create a link to a variable. Click on the SCOPE.

In the Enter variable name type in a variable message. This gets entered into the program as 'message' of type String as shown.

Click Functions and enter Init. It has no arguments.

Click on Edit to open the interface shown.
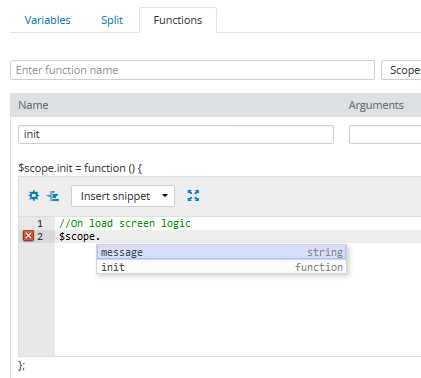
You are now going to write the details for the function as shown. You can see the options available for you. Click message.
Complete the code: $scope.message=""; //My First Ionic app. That was easy";
Click save after completing $scope.message
Open the DESIGNER to complete the Item text which is now just a place holder.

Highlight Item text field in DESIGNER and in the properties insert {{message}} in its place as shown. The binding of the field to the variable is now complete.

Test the app
It is built in click on Test to open a new window with your app getting displayed. You can choose Portrait|Landscape as well as three different foot prints as shown.

At this point you can share this or view it on your phone. For viewing on the phone you need to download a viewer app from Google Play / Apple Store. The app as (appery.io tester) seen on Apple Store is shown here. Download the app to your phone. It seems to respond faster than Intel XDK app viewer.

Launch the app and provide the username / password that you used to register for appery.io and your app will be displayed. Double click on the app and the contents will be displayed as shown.


Comments
Mobile App Development Company in Dubai
Android App Development Company in Dubai
Have an Ionic app idea? Click Way2Smile, an Expert App Development Company in Chennai to get started with your new project in Ionic.
Freelance Ionic App Developer
bulk sms marketing chennai
bulk sms service chennai
promotional sms chennai
sms marketing chennai
sms service provider in chenna
bulk whatsapp service provider in chennai
bulk sms marketing in chennai
bulk sms price in chennai
bulk sms provider chennai
bulk sms service provider in chennai
chennai bulk sms
best bulk sms service provider in chennai
bulksms in Chennai
Digital Marketing Company in chennai
Digital marketing Services in chennai
mobile application development services chennai
Online shopping Website Developers in chennai